Room Acoustics before Buying A Microphone
Field notes for room acoustics before buying a microphone: what changes during calls, handoffs, travel days, and long focus blocks, without turning the desk into a showroom.
Upgrading your workspace audio usually begins with browsing premium microphones, but placing a highly sensitive capsule inside a bare, small room simply captures the flaws of that space with greater fidelity. In small offices—typically converted spare bedrooms or apartment alcoves—sound waves bounce rapidly between parallel walls, creating a distinct, metallic reverberation known as flutter echo. Before investing in dedicated audio hardware, addressing the physical acoustics of your environment is a mandatory step. This comparison examines how physical room treatments, strategic microphone placement, and software processing interact within constrained spaces, helping you decide where to allocate your budget so you can maintain professional audio quality through client presentations and deep-focus work without listener fatigue.
Small-Room Reverb vs. Microphone Sensitivity
The fundamental issue with small-space audio is the proximity of parallel surfaces. When you speak, the sound waves travel outward, hit the drywall, glass, or hard flooring, and reflect back to the microphone milliseconds later. In a room measuring ten by twelve feet, these early reflections arrive so quickly that they smear the original audio, creating a hollow, distant quality often described as the bathroom effect. Buying a premium condenser microphone in this scenario is counterproductive; condenser capsules are designed to be highly sensitive and capture a wide frequency range, meaning they will pick up every acoustic reflection in the room with pristine clarity.
Conversely, dynamic microphones operate on a different mechanical principle, utilizing a heavier moving coil that requires more sound pressure to generate a signal. This inherent lack of sensitivity makes them naturally better at rejecting distant background noise and room reflections. However, a dynamic microphone does not eliminate the room's acoustics; it simply masks them by requiring you to speak very close to the grille. If your small office has severe flutter echo, the reflections will still bleed into the dynamic capsule, especially if you naturally speak loudly or lean back in your chair during long meetings.
Comparing the two approaches reveals that hardware alone cannot solve a physics problem. A sensitive condenser demands a treated room to sound professional, while a dynamic microphone offers a partial physical bypass but restricts your movement. Understanding this relationship is the first step in diagnosing your workspace audio. If you cannot tolerate sitting two inches from a microphone grille during an eight-hour workday, you must address the room's reflective surfaces before selecting your hardware.
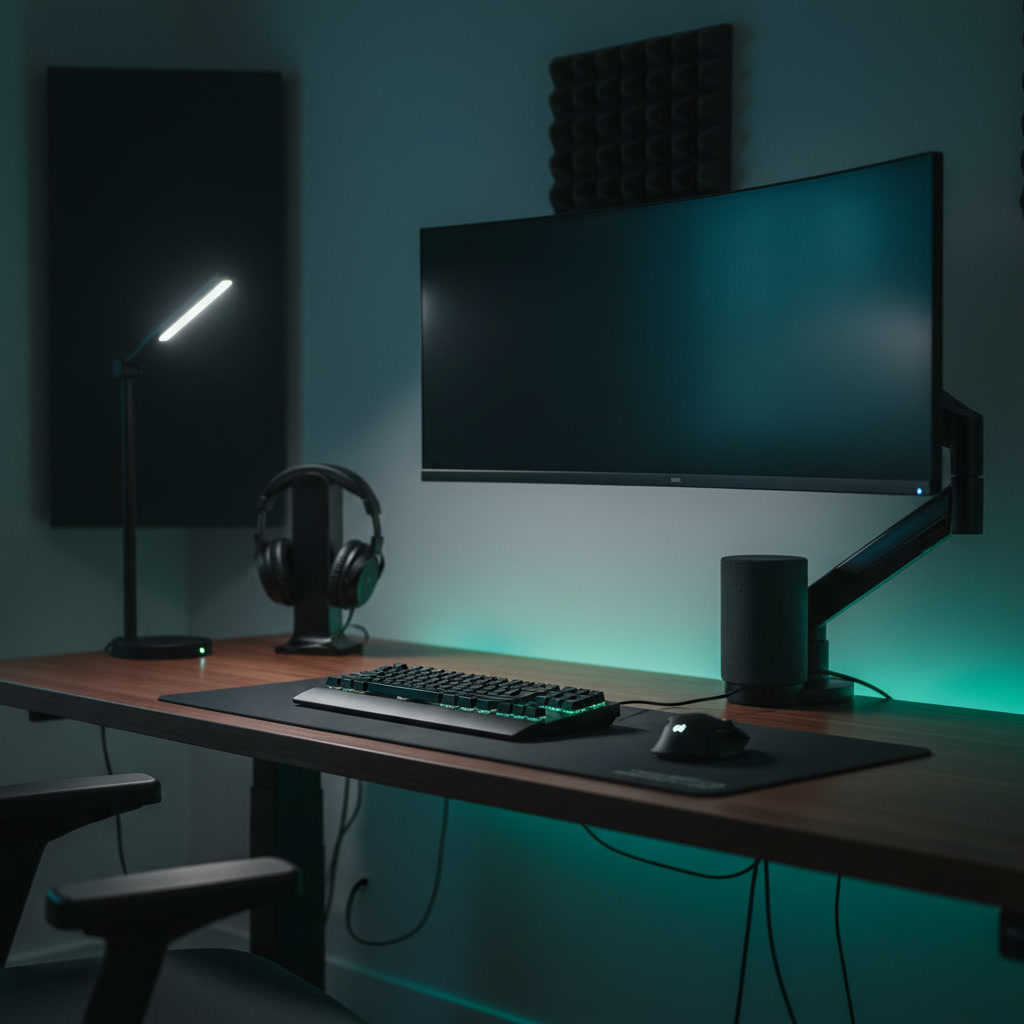
Household Furnishings vs. Dedicated Acoustic Panels
For professionals working in multi-use spaces, the first line of acoustic defense often involves repurposing existing household items. Heavy blackout curtains, thick wool rugs, and fully stocked bookshelves act as functional diffusers and absorbers. A bookshelf positioned directly behind your desk breaks up flat parallel surfaces, scattering sound waves rather than reflecting them directly back at the microphone. Similarly, a dense rug over hardwood flooring immediately reduces high-frequency reflections. These everyday items require zero additional installation and serve dual purposes in a small space where every square foot matters.
However, household furnishings have strict limitations, particularly regarding low-mid frequencies. A rug or a curtain will absorb the sharp, high-pitched ringing in a room, but they lack the density to trap the lower frequencies that cause voice audio to sound muddy or boomy. This is where dedicated acoustic panels become necessary. Unlike cheap polyurethane foam squares that only deaden high frequencies and leave a room sounding unnaturally muffled, proper acoustic panels are constructed from rigid fiberglass or mineral wool, wrapped in acoustically transparent fabric.
When comparing the two, the most effective strategy for a small office is a hybrid approach. Utilize rugs and curtains for baseline high-frequency control, then strategically mount two to four mineral wool panels at the primary reflection points—typically the side walls immediately to your left and right, and the wall directly in front of you behind the monitors. This targeted application of dedicated panels prevents the room from sounding dead while effectively controlling the mid-range frequencies that household furnishings cannot address, creating a balanced acoustic environment without consuming valuable floor space.
Placement Proximity vs. Polar Pattern Rejection
Acoustic treatment is only half the equation; how you physically interact with the microphone dictates how much of the room is actually recorded. The concept of the inverse square law dictates that as you halve the distance between your mouth and the microphone, the volume of your voice increases significantly relative to the background noise and room reverb. Moving a microphone from twelve inches away to four inches away drastically improves the signal-to-noise ratio. In a small, untreated room, aggressive proximity is the most effective acoustic treatment available, completely free of charge.
Relying solely on proximity, however, introduces ergonomic constraints. Maintaining a rigid posture four inches from a microphone capsule is exhausting during a day filled with back-to-back video calls. To regain freedom of movement, users often look to microphone polar patterns—specifically cardioid and supercardioid designs. These patterns are engineered to accept sound from the front of the capsule while rejecting audio arriving from the rear and sides. A supercardioid microphone placed correctly can effectively ignore the reflections bouncing off the wall directly behind it.
The comparison here is between physical discipline and hardware directivity. While a tight polar pattern helps reject off-axis room noise, it also means that if you turn your head to look at a secondary monitor, your voice volume will drop sharply. For small-space workers, the ideal compromise is mounting a cardioid microphone on a high-quality articulating boom arm. The arm allows you to bring the microphone into the optimal proximity zone when speaking, and easily push it out of the frame when reviewing documents or taking a break, maximizing the benefits of both proximity and polar rejection without permanent ergonomic compromise.
Software Processing vs. Physical Dampening
With the rapid advancement of machine learning, digital noise suppression has become a primary tool for remote professionals. Software solutions integrated into communication platforms, alongside standalone applications, analyze incoming audio and strip away continuous background noise, keyboard clatter, and even room reverberation. In a small, highly reflective room, turning on aggressive software suppression can immediately dry up the audio, making a bare room sound superficially like a treated studio. For workers who travel frequently or cannot modify their apartment walls, software processing offers a highly practical, zero-footprint solution.
The drawback of heavy digital processing is the introduction of audio artifacts. When software aggressively removes room reverb, it often clips the natural decay of your voice, resulting in a robotic, underwater, or artificially gated sound. During prolonged meetings, this unnatural audio quality can cause listener fatigue for your clients and colleagues. Furthermore, software suppression requires system resources; running real-time audio processing alongside heavy spreadsheets, browser tabs, and video encoding can cause latency or system instability on older hardware.
Physical acoustic treatment, by contrast, operates with zero latency, requires no CPU cycles, and never introduces digital artifacts. By physically dampening the reflections in the room, you reduce the workload on your software filters. The most reliable setup for a small workspace relies on physical treatment to handle the bulk of the room reverberation, allowing you to run software suppression on its lowest, least destructive setting. This comparison highlights that software should be used as a safety net for unpredictable noises—like a passing siren—rather than a structural fix for a poorly sounding room.
The Hardware Upgrade vs. The Room Upgrade
When allocating a workspace budget, the visual appeal of a premium microphone often outweighs the utilitarian nature of acoustic panels. Buying a high-end microphone feels like a definitive upgrade, complete with immediate unboxing satisfaction. However, connecting a premium microphone in a bare room simply highlights the acoustic flaws of the space. The microphone will accurately capture the flutter echo, the hum of your computer fans, and the resonance of your desk surface. The hardware upgrade, executed prematurely, often leads to immediate buyer's remorse when the resulting audio sounds worse than a standard headset.
Investing in the room first flips this dynamic. By adding a thick rug, installing a few mineral wool panels at key reflection points, and utilizing a boom arm to get your current microphone closer to your mouth, you fundamentally change the acoustic baseline of the space. In a treated room, even a basic USB microphone or a mid-tier headset will sound surprisingly warm and professional. The room upgrade ensures that any audio hardware you currently own performs at its absolute peak, providing a solid foundation for future investments.
The most pragmatic approach for small-space professionals is a staged investment. Begin by executing the clap test: stand in the center of your office and clap loudly. If you hear a metallic ringing, spend your initial budget on broadband acoustic panels and a reliable boom arm. Once the physical space is controlled and the ringing is eliminated, you can confidently evaluate whether you actually need a new microphone. If you do proceed with a hardware upgrade, the treated room guarantees you will hear the exact performance you paid for.
Decision checklist
- Perform the clap test in the center of your workspace to identify high-frequency ringing and flutter echo.
- Place a thick rug under your desk chair to immediately reduce floor-to-ceiling sound reflections.
- Position your microphone on an articulating arm to keep the capsule within four to six inches of your mouth.
- Install two rigid mineral wool acoustic panels on the side walls at ear level to catch early reflections.
- Lower the aggression level of your software noise suppression to prevent robotic audio artifacts.
Who should skip this
If your workspace is already heavily furnished with plush sofas, thick carpets, and floor-to-ceiling bookshelves, your room may already be acoustically dead enough to support a sensitive microphone without additional treatment. Furthermore, if your daily workflow consists entirely of internal team check-ins where pristine audio fidelity is not a priority, relying solely on your communication software's built-in noise suppression is a perfectly acceptable, cost-free strategy that requires no physical modifications to your space.
Maintenance note
Acoustic panels require minimal but consistent upkeep to remain effective and visually appealing in a professional environment. Vacuum the fabric covers lightly once a month using a brush attachment to prevent dust accumulation, which can discolor the fabric over time. Periodically check the mounting hardware, especially if you have installed heavy mineral wool panels on drywall, to ensure the anchors remain secure. Finally, review your software audio settings after major operating system updates, as default noise suppression levels frequently reset and can override your preferred configuration.
The Connected Desk is a reader-supported publication. When you purchase workspace audio equipment or acoustic treatments through links on our site, we may earn a commission. This structural independence allows us to recommend practical, physics-based solutions over purely hardware-driven upgrades.
FAQ
Will cheap acoustic foam squares fix my room echo?
No. Thin polyurethane foam only absorbs very high frequencies. Covering your walls in cheap foam will leave the mid and low frequencies untreated, resulting in a muddy, muffled room sound that is often worse than the original echo.
Do I need to cover my entire wall with acoustic panels?
Covering the entire wall is unnecessary and will make the room sound unnaturally dead. In a small office, treating just 15 to 20 percent of the wall surface area—specifically targeting the early reflection points around your desk—is sufficient for professional voice audio.
Should I buy a dynamic or condenser microphone for a small, untreated room?
A dynamic microphone is generally the safer choice for an untreated room. Because dynamic capsules are less sensitive, they naturally reject more background noise and room reverberation, provided you speak very close to the microphone grille.
Can I just use software noise cancellation instead of buying acoustic panels?
Software suppression is highly effective at removing background noise, but relying on it to fix severe room echo often results in robotic, clipped audio artifacts. Physical acoustic treatment allows you to use software filters on lower settings, preserving the natural tone of your voice.
Commercial decision framework
Upgrading your microphone without addressing room acoustics is a common and expensive mistake. Even a premium condenser mic will sound hollow and unprofessional in a room with bare walls and hard floors. Before investing in high-end audio gear, evaluate your workspace's natural reverberation. Adding soft furnishings, acoustic panels, or simply choosing a dynamic microphone over a condenser can yield better results than throwing money at broadcast-grade equipment in an untreated space.
Working in modern spaces with hard surfaces creates severe echo. You need heavy acoustic mitigation or a broadcast-style dynamic microphone that rejects off-axis sound.
Your space already features carpets, heavy curtains, and bookshelves. This natural dampening means you can safely invest in a sensitive condenser microphone without capturing excessive room noise.
Moving between dining tables, hotel rooms, and co-working spaces means you cannot control your acoustic environment. Focus on close-proximity headset microphones or highly directional shotgun setups.
Check: Ratio of hard (glass, drywall, wood) to soft (fabric, carpet) surfaces.
Why it matters: Hard surfaces reflect sound waves, creating the hollow echo that ruins call clarity regardless of microphone quality.
Check: Ceiling height and parallel walls.
Why it matters: Small, perfectly square rooms create standing waves and low-frequency buildup, making voices sound muddy and indistinct.
Check: HVAC systems, street traffic, and computer fan noise.
Why it matters: Sensitive microphones will amplify a high noise floor. High ambient noise dictates a dynamic microphone rather than acoustic treatment alone.
Check: Distance between your mouth, the microphone, and the nearest wall or monitor.
Why it matters: Speaking directly into a monitor or wall bounces sound straight back into the microphone, causing phase cancellation and a thin vocal tone.
Check: Whether the mic captures sound from all directions (omnidirectional) or just the front (cardioid).
Why it matters: Matching the polar pattern to your room's acoustic flaws is the most effective way to reject unwanted reverberation.
Shortlist by segment
Best for: Untreated rooms with hard surfaces and noticeable echo.
Watch out: Requires you to stay within a few inches of the capsule; often needs a dedicated audio interface.
Best for: Acoustically treated spaces or rooms with heavy soft furnishings.
Watch out: Highly sensitive to keyboard clatter, chair squeaks, and street noise.
Best for: Keeping the microphone out of the camera frame while rejecting side noise.
Watch out: Susceptible to sound bouncing off the wall directly behind you.
Best for: Maximum voice isolation in highly reverberant or noisy environments.
Watch out: Can look overly corporate on video calls and may cause fatigue during long sessions.
Implementation checks
- Perform the clap test: clap loudly in your workspace and listen for a ringing echo.
- Record a test call using your current laptop microphone and listen back with headphones to identify room flaws.
- Temporarily hang thick blankets over bare walls or windows to hear the difference in vocal clarity.
- Measure the distance from your mouth to your intended microphone position; it should ideally be under six inches.
- Turn off all music and sit in silence to identify persistent hums from refrigerators or air conditioning units.
Retailer checklist
- Verify the return policy allows testing the microphone in your specific workspace.
- Check if the microphone includes a shock mount to isolate desk vibrations.
- Look for bundled software that offers active noise suppression or EQ adjustments.
- Confirm whether the microphone requires a separate boom arm for proper placement.
- Ensure the connection type matches your current hardware setup.
- Avoid bundles that include cheap, thin acoustic foam, which does little to absorb vocal frequencies.
FAQ
Will acoustic foam panels completely soundproof my home office?
No. Acoustic foam absorbs high-frequency reflections to reduce echo, but it does not block sound from entering or leaving the room. True soundproofing requires construction changes to add mass and decouple walls.
Should I buy a dynamic or condenser microphone for a home office?
Unless your room is heavily furnished or acoustically treated, a dynamic microphone is usually the better choice. It is less sensitive to background noise and room reverberation compared to a condenser microphone.
Can software noise cancellation fix a bad sounding room?
Software tools are excellent at removing steady background noises like fans or lawnmowers, but they struggle with room echo. Relying heavily on software to remove reverberation often leaves your voice sounding robotic and degraded.
Where is the best place to position acoustic treatment for video calls?
Start with the first reflection points: the walls directly to your left and right, and the wall directly behind your monitors. Treating these areas provides the most noticeable improvement in vocal clarity.